Thank you for the screenshots. They enabled me to find out your problem.
First and foremost, you need to follow the instructions as given. All those instructions we sent you were important but never the less you chose to ignore them! You need to stop doing that.

Inoticed from your screenshots that you are using.NET version 2.0 instead of 3.5. If you want to use Visual Web Developer 2008, you MUST INSTALL.NET version 3.5. This is what was bringing the following error:
This is extremely important so please stop being difficult and just follow these simple steps one by one. Don’t skip any step along the way.
Step 1
Download and install.NET version 3.5 on your machine. Go to Microsoft where you will access it for free. If you don’t install this, the Project will not run because Visual web Developer 2008 requires this to work!
Step 2
Make sure that you have installed Internet Information Services (IIS) Manager in your machine. Failure to install this will make your project useless and it will NOT WORK! To install IIS, follow the instructions below.
To install IIS, simply follow these steps:
- In the Control Panel, select Add or Remove Programs.
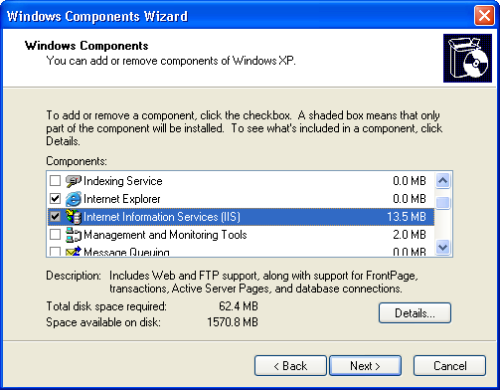
- Choose Add/Remove Windows Components. The list of components will become visible within a few seconds.
- In the list of components, check Internet Information Services (IIS), as shown in Figure 1.2. The default installation options are enough for ASP.NET development, but you may want to click Details… to view the extra options you could add.
- Click Next. Windows may prompt you to insert the Windows CD.
Add Administrative Tools to the Start Menu
Here’s how to add Administrative Tools to the Windows XP Start menu:
- Right-click on the Start button and select Properties to bring up the Taskbar and Start Menu Properties dialog.
- Click the Customize… button to bring up the Customize Start Menu dialog.
- If you’re using the classic Start menu, check Display Administrative Tools, then click OK.
- If you’re using the Windows XP-style Start menu, click the Advanced tab, scroll through the Start menu items list until you get to System Administrative Tools, and select from Display on the All Programs menu or Display in the All Programs menu and the Start menu.
Once IIS is installed, close the Add or Remove Programs dialog. To check that IIS has been installed correctly, see if you can find the Internet Information Services shortcut in Administrative Tools. If you can, IIS is installed. Open the link to make first contact with the IIS management console, which is shown in Figure 1.3. In the left pane, you’ll initially see the name of your computer, whose nodes you can expand.
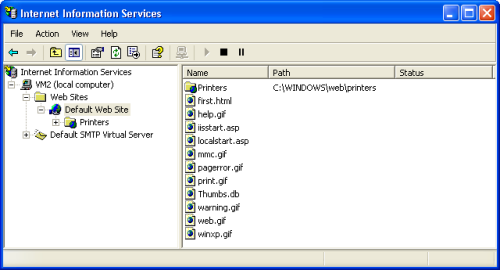
In the Internet Information Services management console, right-click Default Web Site and select New > Virtual Directory. The Virtual Directory Creation Wizard will appear. Click Next.
You need to choose an alias for your virtual directory: enter RMS, then click Next.
Browse and select the Project folder you created, or enter its full path (C:InetpubwwwrootProject). Click Next.
In the next screen, you can select permissions settings for your directory. Typically, you’ll want to leave the default options (Read and Run scripts) checked. Click Next.
Click Finish. You’ll see your new virtual directory as a child of the Default Web Site, as the Figure above illustrates.
Step 3
MOVE the project to the Web server folder at C:Inetpubwwwroot.
It is VERY IMPORTANT that the Project be in this folder otherwise it will not run. I noticed that your project is running from the desktop and this is not what I told you to do! Make sure the Project is inside the wwwroot folder.
Step 4
The database is designed in SQL so make sure that you have SQL server installed. You need to have version 2005 or above.
Step 5
After following the above steps, open Visual web Developer 2008.
Go to the Menu and click File > Open > Web Site. Navigate to the folder where you moved the project i.e, C:InetpubwwwrootProject and open the project.
Step 6
The website should now run without issues. In case you need to communicate to me again, make sure you note down the version of.NET you are using, the version of SQL server you are running and whether or not you understood the steps above. We need to move ahead so please follow those simple guidelines and don’t do your own things. Wish you al the best in this project.