Introduction
Fabrication is a term common to the industrial world. It makes reference to the processes that facilitate shaping up of metals including cutting, bending and assembly among others.. The process to be used are of often guided by the material requirements for the end product desired. Modern technology has made it possible to easily identify materials and processes used in fabrication of a given structure. Image evaluation under magnification offers an effective tool in evaluation of components for material and processes involved in its fabrication. Metallography is useful in understanding the relation between material structures and its physical and mechanical properties (Smith, 1993: 56). This helps in determination of the fabrication processes associated with the component under evaluation. In this report a number of structures were evaluated. This included a car body, axle and screw.
Successful evaluation of the structures of the mentioned cross-sections was facilitated by a number of processes prior to microscopic observation. These include the following:
- Obtaining a number of sample specimens for post-observation preparation. This included a choice of three samples for each of the mentioned parts to be evaluated.
- With water as a lubricant, the surfaces to be investigated were ground using silicon carbide papers.
- Alumina was then used to remove the mirror like surface formed from by the grinding process. The surface is then washed with soap and water after which it’s dried with alcohol using blasted air.
- Etching is then conducted in order to facilitate observations of layers having different chemical compositions under microscope. The etching reagent is washed with water before it is dried with alcohol.
- Observation is then conducted on the etched surface using magnifying glasses and appropriate observations made.
- The etched surfaces are then subjected to micro-structure observation whereby they are observed under the microscope.
- The last step was taking photographs of the micro-structures of the samples and then compares it to photos of microstructures online to determine what the samples are made of.
Observations
While observation under naked eye and magnifying glasses presented not significant results, observation under microscope produced interesting structures which could interest any person studying metallography. Various photos of the structure observed under microscope were taken as shown by the three samples attached.
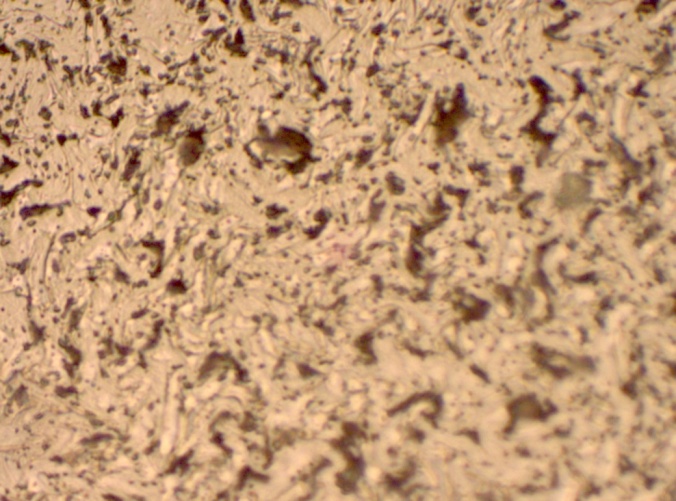
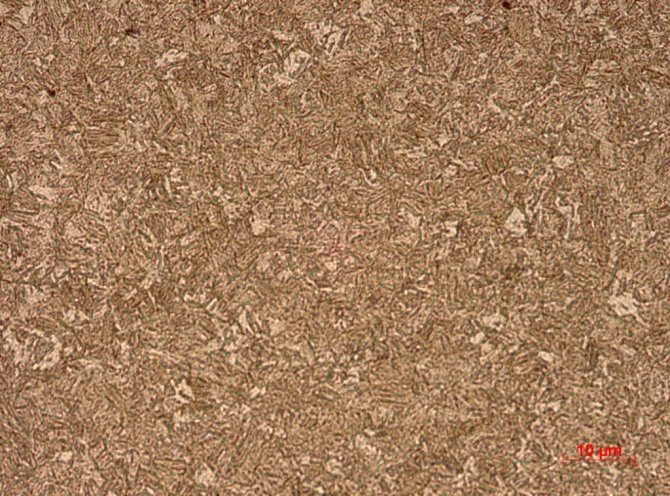
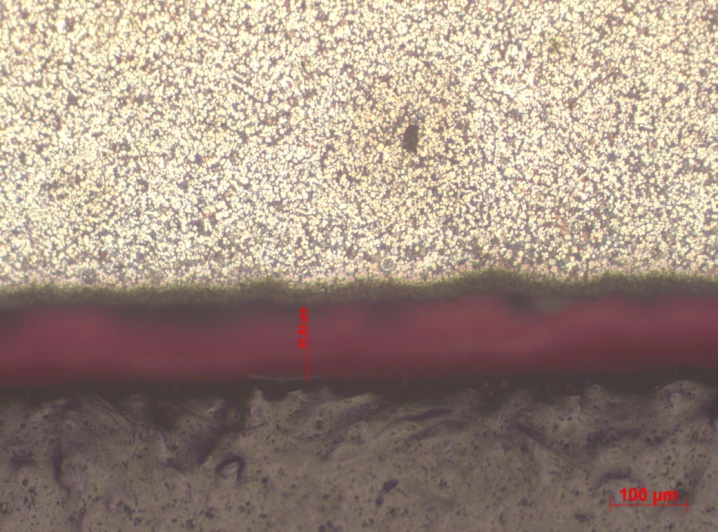
The three figures are selected photographs taken under microscope in order to facilitate analysis of materials and processes used in their fabrication. The structures were compared against selected online microstructure photographs in order to facilitate their context placement.
Discussion and analysis
Figure 1
The axle structure shows presence of ferrite and pearlite grains on the deformed prior austenite grains boundaries. In the space between the ferrite pearlite structures, bainite grains are observed. Cracks with inclusions are also observed. The alignment of these structures takes a similar look to that observed in a low carbon steel picture.
On every micrograph one can see the lack of grain structure in the upper 20…30 μm thick layer (on the left pictures) while grains can be observed only below this outer layer, in the subsurface region. In these outer layers can be the above mentioned strongly deformed crystallites.
Figure 3
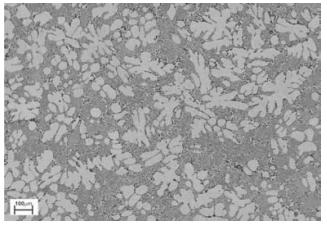
The car body displayed properties similar of Zinc alloys. The crystallization trend shows a directional volume character. The directional crystallization is characterized by boundary changes between solid and liquid phases. Its composition reflects a crystallization process influenced by cast direction. The micro-structure is similar to that of Zinc Alloy could at a rate of 0.68qC/s (Osorio & Freire, 2005: 182). Crystallization can have directional volume character, it is dependent on the phenomena occurred at the crystallization front. Directional crystallization is characterized by a change of the boundary between the liquid and solid phase, as well by a migration of the crystallization front from inside to outside in the cast (contrary to the heat transfer direction). Volume crystallization has typically a lack of a boundary between the liquid and solid phase as well is characterized by heat transfer from the solidified phase, also through the liquid phase (negative temperature gradient).
A weld region is also observed for approximately 97.83µm.
The microstructure consists of an austenitic FCC matrix synonymous with precipitation hardening. Directional crystallization occurs by clearly determined conditions. One of the says, that on the crystallization front there can not occur a too big value of (concentration-) overcooling. Directional crystallization favor big temperature decrease along the cast, what can be achieved by appliance of metal moulds, which have big ability for heat capacity. Crystallization has generally a volume character and builds a microstructure consisting of equiaxial grains. This is the most frequently occurred crystallization type among cast alloys. Cooling rate has a big influence on microstructure and properties of the zinc cast alloys. The effects of appliance of big cooling rates and in the consequence of increased solidification rates onto the cast micro-structure are: avoiding of segregation (block and dendritic), significant phase dispersion (also an decreasing distance between the eutectics plates). By cooling rates dT/dt > 106 to 108 ºC/s appears in succession: unstable or meta-stable solid solutions, new meta-stable phases as well solidification in the amorphous state (Dobrzaski, 2006: 87). Cooling rate has a big influence on the dendritic segregation: low cooling causes microstructure homogenization and decay of dendrites, by a cooling rate typical for a given alloy, instead of dendritic microstructure a grained microstructure in present. Achieving of a certain temperature leads to maximal segregation of dendrites, by very high cooling rates a fine-grained microstructure will be achieved by very high differences of the chemical composition of individual grains (Osorio & Freire, 2005: 182). The aim of fast crystallization is to obtain materials with better properties, which are achieved by dendritic or eutectic microstructure refinement, lowering or avoiding of segregation occurrence, generating of stable phases with extended solubility of compounds or new meta-stable phases, as well morphology change of phases occurred.
Figure 2
The figure shows a coherent lattice structure. A supersaturated condition is observed probably as a result of solution treatment and quenching. The clusters form an intermediate crystal structure or transitional lattice, maintaining registry (coherency) with the lattice structure of the matrix. This phase will have lattice parameters different from those of the solvent, and as a result of the atom matching (coherency) there will be considerable distortion of the matrix. This distortion (strain free) extends over a distance more than the size of a discrete (precipitate) particle. It is this distortion that interferes with the movement of dislocations and accounts for the increase in hardness and strength during ageing (Osorio & Freire, 2005: 184). The depletion of the precipitate-forming elements from the matrix leads to an increase in the modulus of the matrix.
Identifying nickel alloys is often dependant on its properties. As seen from the microstructure no corrosion effects are seen as the surface remains fine grained. Nickel alloys are often corrosion resistant. Metal matrix composites contain composite/reinforced metal are observed. Generally, Nickel alloy is capable of resisting local alloys and its microstructure evidences this.
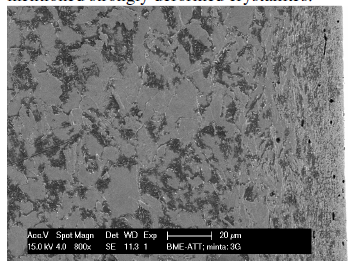
Figure 4 represents a low carbon steel microstructure. The car axle photographs compares in stricter to this figure.
Conclusion
In conclusion, it is on basis the afore-discussed factors that a conclusion was drawn as to the choice of material and structures used. The car body was made of Zinc Alloy, the axle was made of low carbon steel, and the screw was made of Nickel Alloy. Appearance of metals more especially under microscopic observation is able to help in identification of the metal used in fabrication of a given structure. This is considering the fact that different metals have different microstructure appearance and likewise deformation trends. The trends usefully help metallographers hypothesize on the possible metal composition under evaluation.
Sample identification
Carbon steels exist in various forms depending on kind of treatment accorded. The microstructure tends to differ depending on the kind of treatment (Bowen et al., 1986). It is important to note that microstructure component define how hard a material is. This report identifies samples of carbon steel observed under a microscope on basis of their structure and hardness test (Vickers hardness test). The samples listed from 1-5 are excepted to include normalized 0.1% carbon steel, drawn 0.1% carbon steel, normalized 0.4% carbon, water quenched 0.4% carbon steel and normalized 0.8% carbon steels. The process of interested with regard to their influence on carbon steels structure and toughness will therefore include normalization, quenching, and drawing. Other than these processes, it will be important to highlight that carbon content affects the hardness of steel (Tarpani, 2002). As carbon content increases, the hardness of carbon steel also increases. However, this statement only holds for as long as the carbon content is ≤ 0.8. Quenching on the other hand results into formation of a hard, brittle microstructure and hence increased hardness (Tarpani, 2002). Normalization on the other hand results into increased hardness of carbon steel. Drawing is a mechanical process which results into increased material hardness. This is true of carbon steel too.
Sample 5
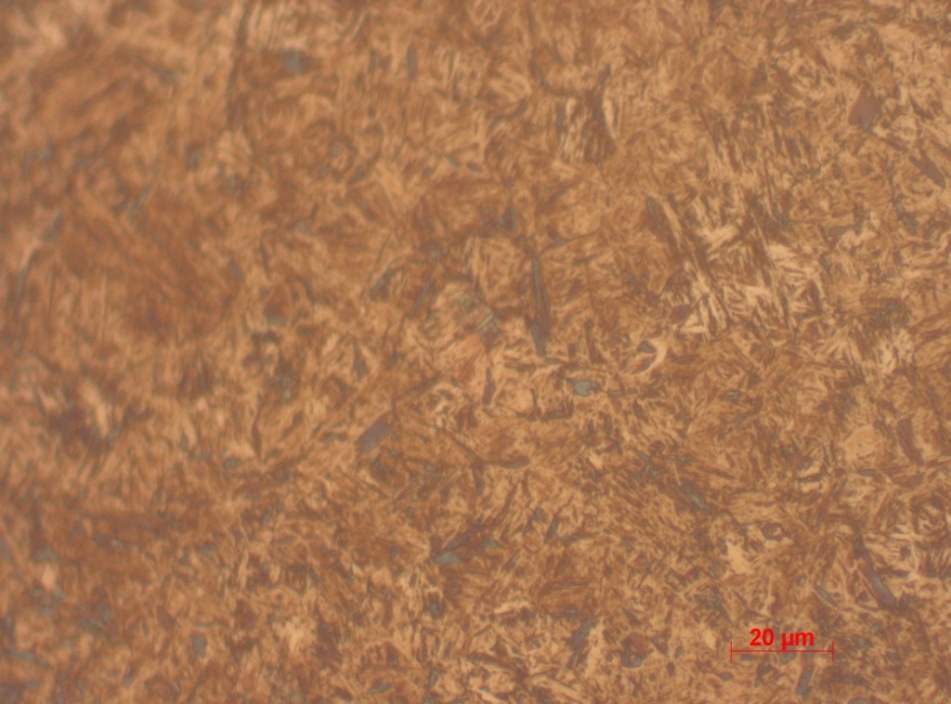
A major constituent of the sample is pearlite observable as wormy structures. The observable wormy structures represent a mixture of ferrite and iron carbide. The fine structure of pearlite is attributed to adequate cooling time provided. The structures hardness is highest. This is visible by the average hardness of >600 recoded from Vickers tests. Based on the mentioned structural composition and the hardness test, the sample is concluded to be 0.8% carbon.
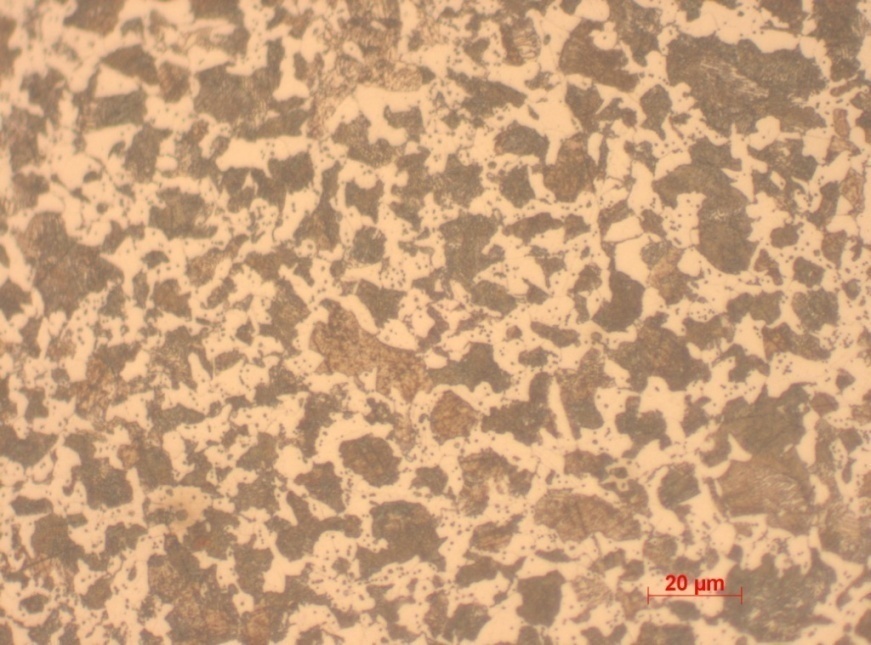
Sample 1 is classified as 0.1% quenched carbon steel. This is attributed to the fact that quenching facilitates speedy cooling after heating and hence ferrite and pearlite layers are distinctly formed. Additionally, it records low level of hardness as compared to the other steel samples. The average Vickers’s hardness is 219.33 a value that is relatively high.
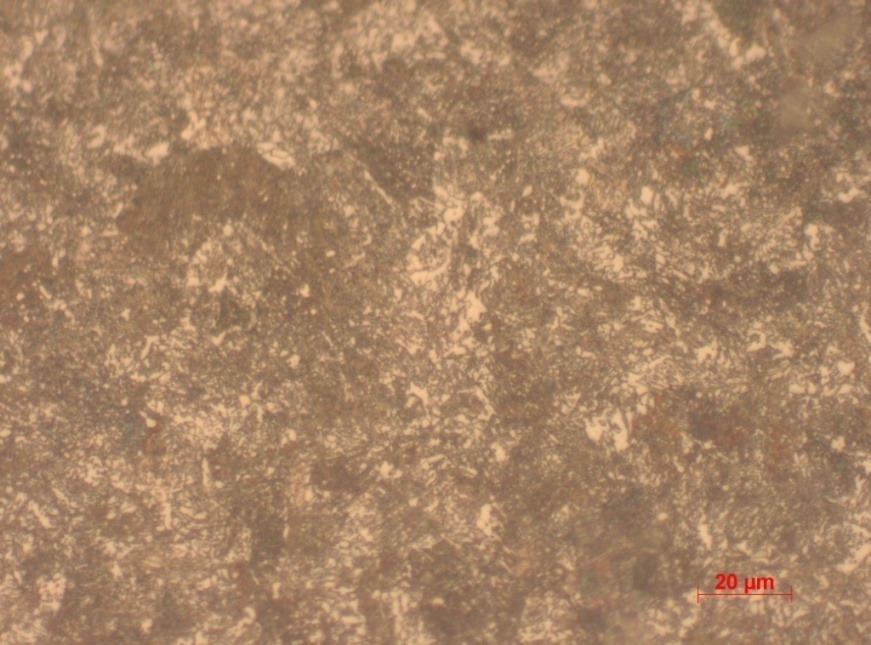
In sample 4, the microstructure shows relatively smooth surface with some level of infirmity. The ferrite and pearlite constitute the cross-sections grain. The hardness level is also higher than most of the sample, except for 5. On this basis the sample is concluded to be 0.4% normalized carbon. Hardness level is further attributed to the relatively high carbon content. As earlier mentioned, increased carbon content results into a corresponding increase in hardness. It therefore follows that in similar circumstances one may assume that 0.4% carbon will yield increased hardness compared to 0.1%. This is seen by the hardness value of 255.67 recorded.
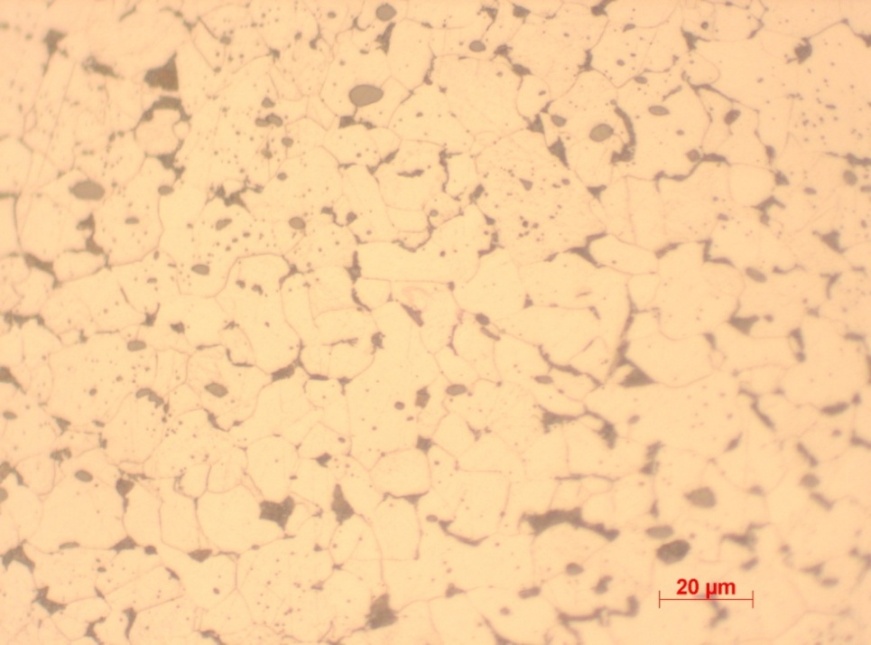
Sample 2 is relatively uniform though mainly composed of ferrite structure. The figure is concluded to be 0.1% rolled carbon and hence a relatively reduced level of hardness. Reduced concentration of pearlite contributes to its relatively low hardness value. Mechanical work improves the hardness of metals and hence rolled carbon is expected to exhibit some increase in hardness. This is reinforced by the average recorded value of 264.67 (Vickers’s hardness).
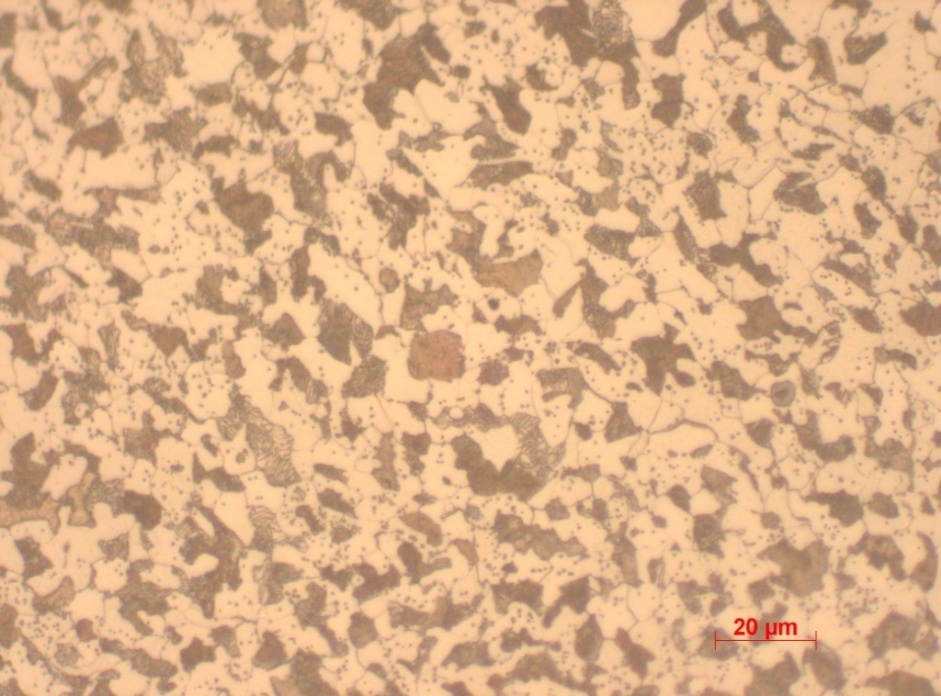
Sample 3 is quenched 0.4% carbon steel evidenced by the large crystals of pearlite and ferrite viewed. However, a large portion is dominated by ferritic structures and hence a relatively average hardness levels. The large crystals are mainly a result of quenching hence limited cooling time. Pearlite and ferrite clamp towards each other as there is inadequate time for intermolecular interaction. Quenching allows room for permeation of cracks and hence relatively reduced level of hardness of 204 as per the Vickers’s test.
In conclusions, it is important to reiterate that all the conclusions are based on the structural composition observed including, smoothness, uniformity, combination of ferrite and pearlite and the level of hardness associated with the sample. In addition the processes used in formation of the shapes are taken into consideration as they influence crystal formation and alignment.
References
Bowen, P. et al. (1986). Differences in metal compositions: case of carbon steel. Acta Metal., 34, p. 1121-1133.
Dobrzaski, L. A. (2006).The engineering materials and materials design. WNT: Warszawa.
Heubner, U. (1988). Nickel alloys. London: Marcel Dekker, Inc.
Osorio, W. R. & Freire, C. (2005). The effect of the dendritic microstructure on the corrosion resistance of Zn–Al alloys, Journal of Alloys and Compounds 397, p. 179-191.
Smith, W.F. (1993). Structure and properties of engineering alloys. London: McGraw-Hill.
Tarpani, J.R. et al. (2002). Material properties and identification. Part I, Mat. Res., 5 (3), p. 357-364.