Abstract
Objectives and Scope
The purpose of the experiment concerned testing the efficacy of the measurement tools such as the Vernir caliper, a depth gauge, a micrometer, and a gauge in an uncertainty analysis. The scope of the investigation was restricted to the analysis of the measurement results.
Method
The experiment was carried out by testing the equipment on fluidic valve end caps.
Results
The Vernir Caliper tool provided the results accurate within one ten thousandth. The ruler allowed a measurement accurate within one thousandth. A micrometer provided results similar to those of a ruler, yet did not measure dimensions A, C, and E. The use of the depth gauge did not yield any results.
Conclusions
The experiment has shown that the Vernir Caliper tool allows for the most precise measurement of various items along with the ruler. The depth gauge returned zero results, while the micrometer showed minor discrepancies.
Introduction
The goal of the experiment concerns identifying the efficacy of measurement tools. The latter include a Vernir caliper, a depth gauge, a micrometer, and a gauge. The bias error, which is predetermined by the offset in measurement, and a precision error, which is the difference between the measurement results and the actual value, may lead to misinterpreting the measurement results.
Experimental Setup and Procedures
A fluidic valve cap (Fig. 1, Fig. 2) was chosen as the object of the experiment.
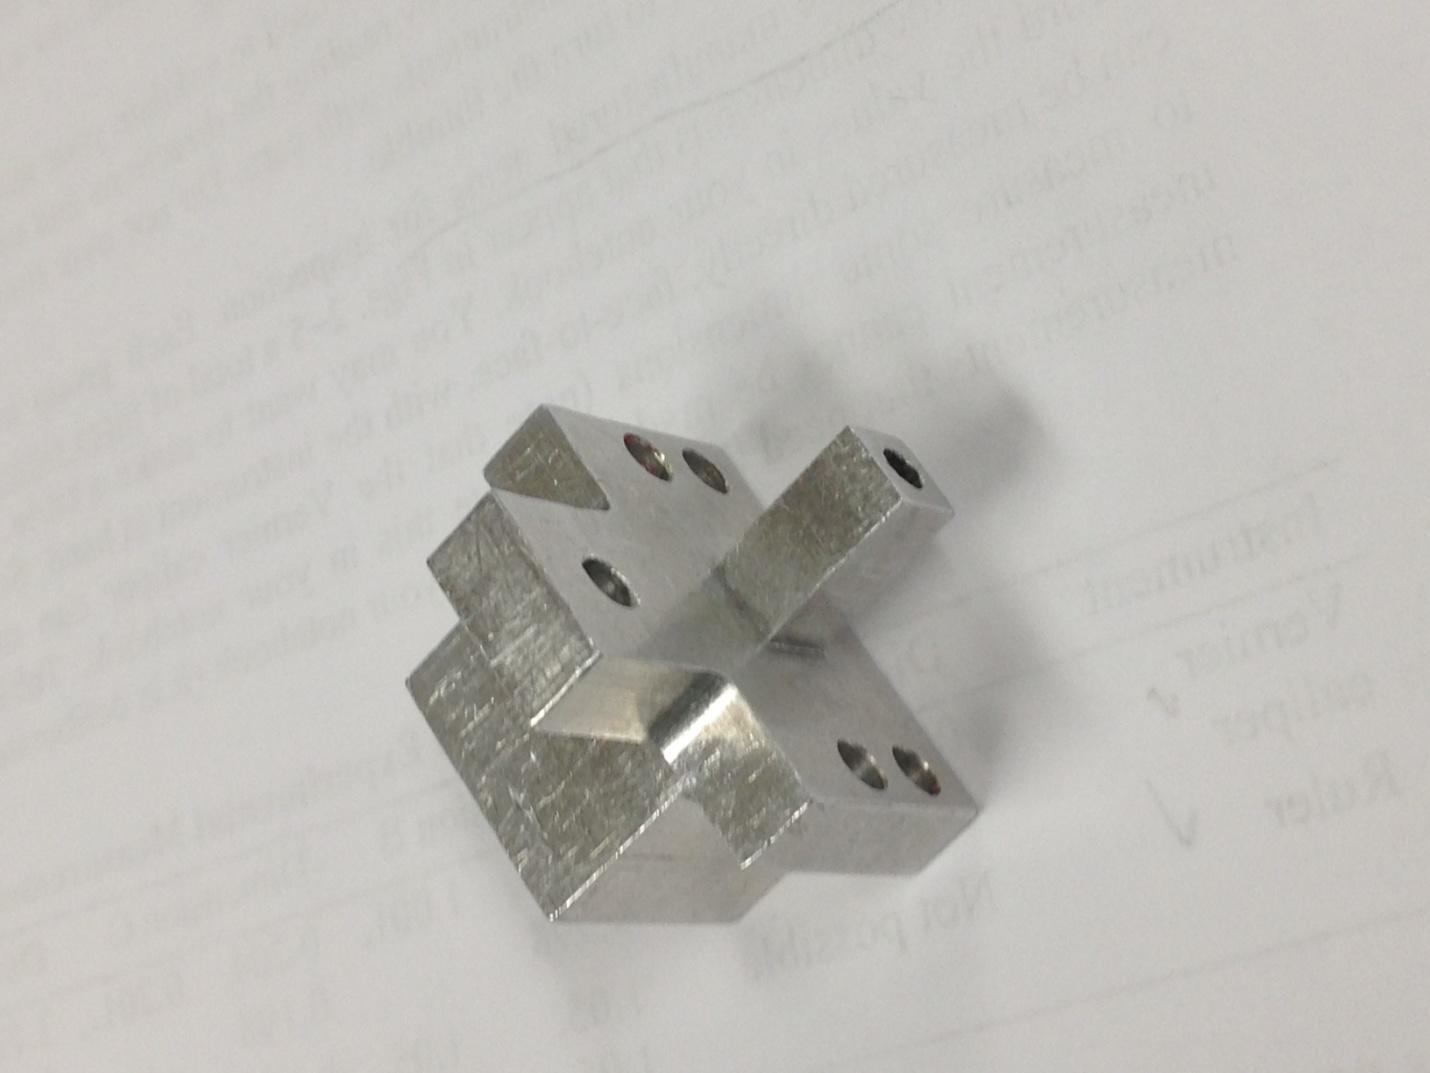
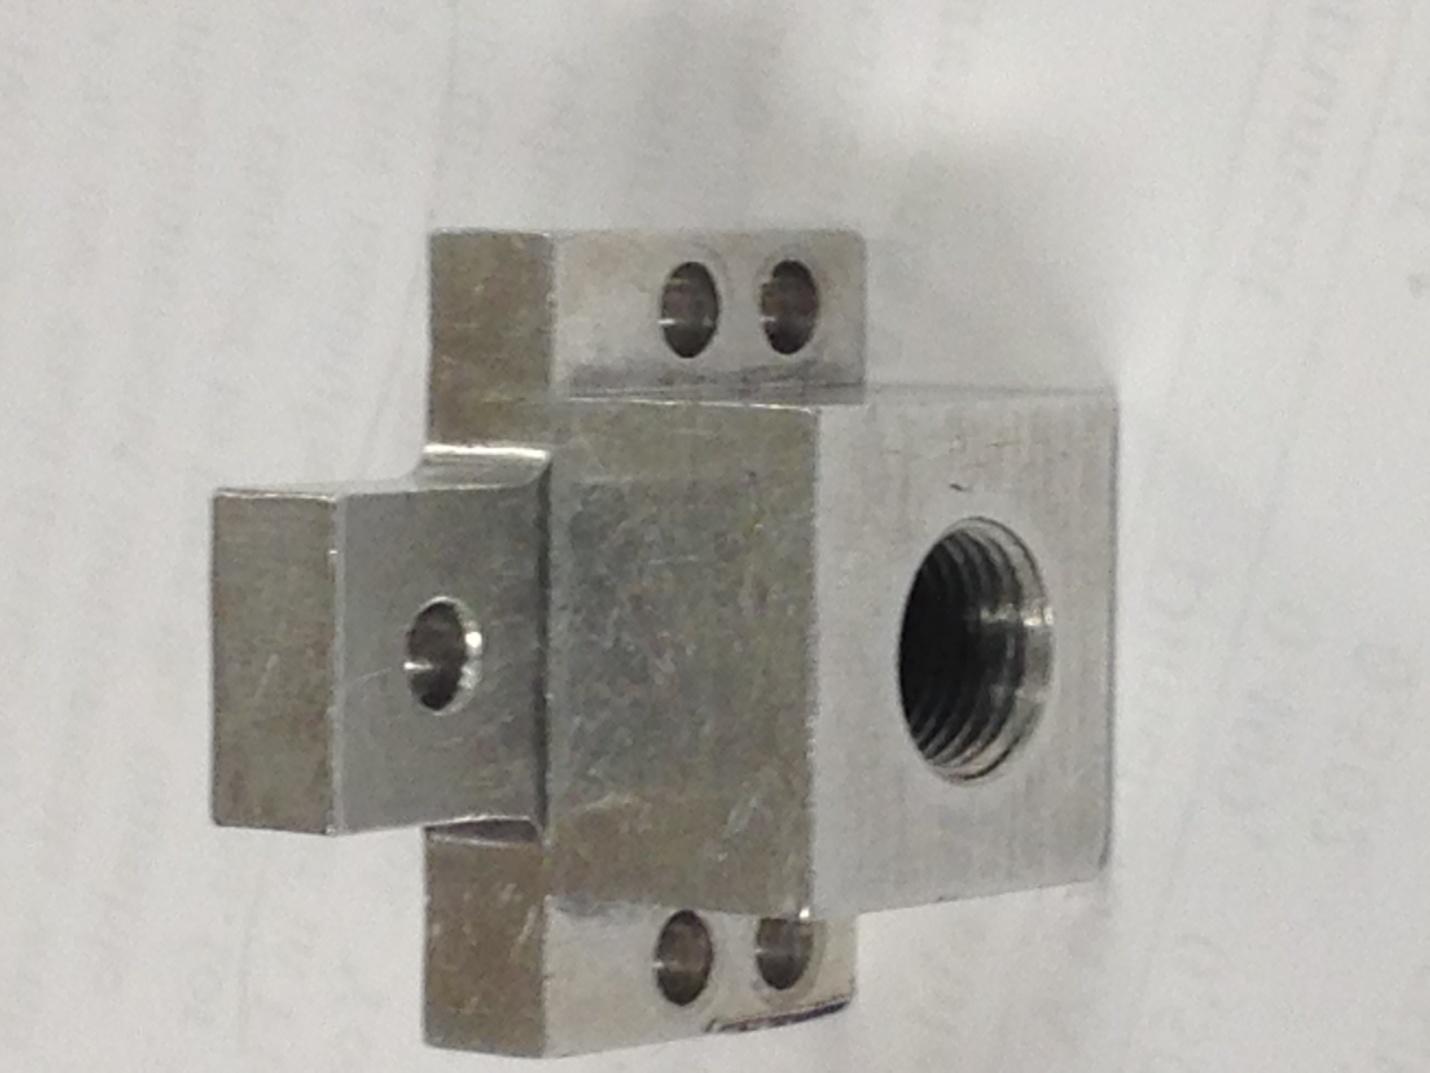
First, the resolution of the tools was identified. Afterward, the tools were checked for the zero value, which is defined as the false reading that a measurement tool may display when the actual value equals zero [1].
Then, each instrument was used to measure dimensions A, B, C, D, and E three times. The measurement results were formatted as an Excel table. Dimensions A, C, and E could not be measured with either the depth gauge or the micrometer. Moreover, the depth gauge failed to measure any of the dimensions.
Results and Discussion
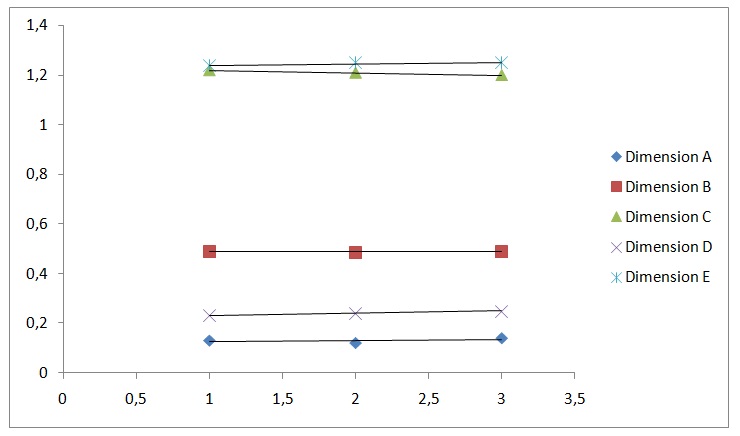
The measurement outcomes show that the tool in question displayed rather uneven results when the measurement of dimensions C and E occurred.
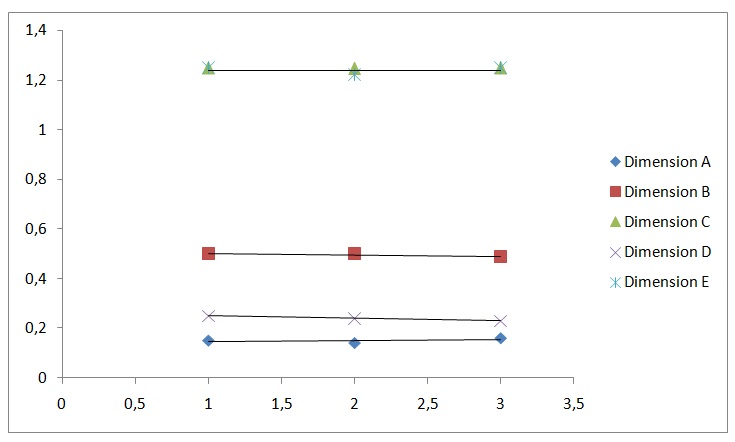
The plot above shows clearly that the ruler provides larger results than the Vernir caliper. In addition, the difference in the measurement outcomes for the same element of the fluidic valve end cap is the lowest for the Vernir caliper and the ruler. The plot indicates that the ruler has a bias error, as it does not match the measurements from other instruments, whereas the rest of the measurements retrieved generally match each other and the ones in the manual..
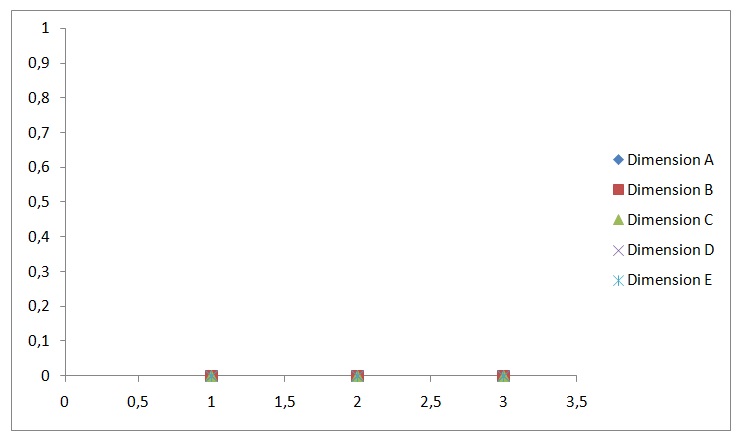
As the scatter plot below shows, the depth gauge did not read any of the dimensions. The given phenomenon points clearly to the fact that the gauge cannot be used as a trustworthy tool for measuring the dimensionsof an object, especially when the latter has uneven sides [2]..
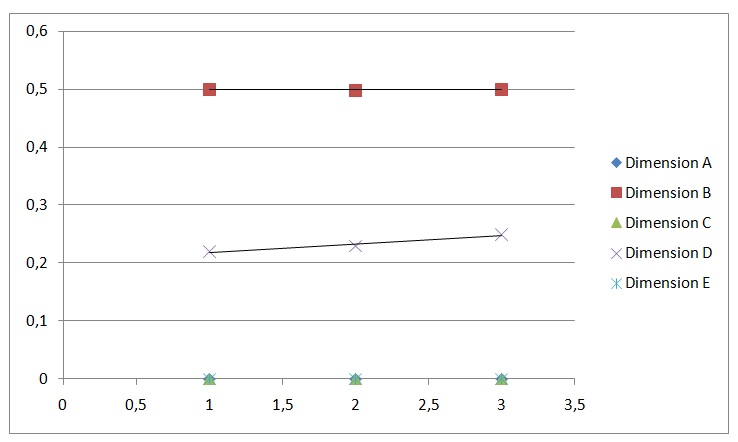
The micrometer also failed to deliver the measurement results for dimensions A, C, and E.
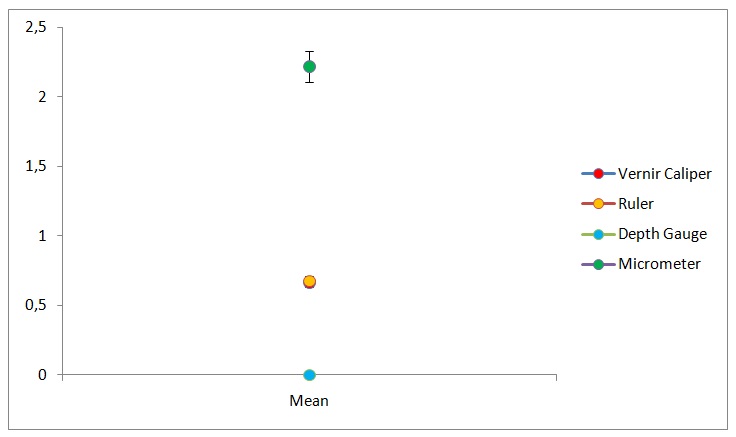
Table 1. Mean Experimental Values.
The table shows that the Vernir caliper has the highest mean. The micrometer, in its turn, has the highest standard error value, which means that the results provided by this measurement tool are not quite credible.
The data provided in the sets above seems to be correct. The data, however, does not match the example provided in the manual. Particularly, dimensions E and A have a value according to the experiment results, whereas the sample does not provide these values.
Conclusion
As the results of the analysis display, the Vernir caliper and the ruler can be deemed as the most efficient tools for measuring the dimensions of objects. The experiment has displayed that the two measurement tools specified above allow for the highest precision rates and have a comparatively low average.
Bibliography
- Braun, E. M., “Metrology,” Mechanical Methods and Measurements Laboratory Manual, 2012.
- Bewur, T., Metrology & Measurement, Tata McGraw-Hill, India, 2011.